Showing posts with label Gluten-Free. Show all posts

Friday, January 3, 2014


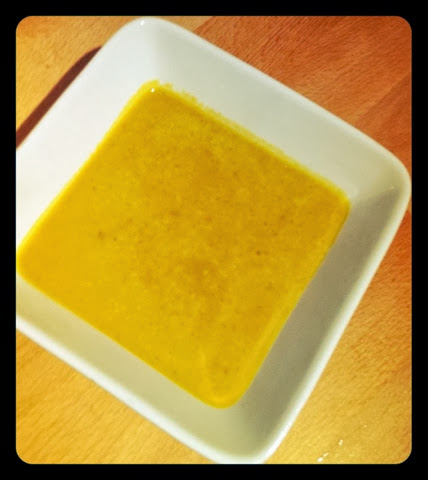
Curried Coconut Pumpkin Soup
It's been -30˚C in Toronto for the last couple of days and my apartment is FREEZING! This soup has been keeping me nice and toasty. I got the inspiration from my wonderful friend Grace van Berkum. She made a similar one for the raw dinner we threw together back in October 2013. My version takes advantage of the robust flavours that come from caramelizing red onions and give the soup a depth of flavour.

Curried Coconut Pumpkin Soup
Serves 4

⦿ 1 Red Onion, chopped
⦿ 2 Tbls Coconut Oil (or Olive Oil)
⦿ 4 Cloves Garlic, finely chopped
⦿ 1 Tbls Curry Powder
⦿ 1 Tbls Turmeric Powder
⦿ 1 Can Organic Pumpkin
⦿ 1 Can Organic Coconut Milk (if anyone knows a brand that has a BPA-free can, please tell me!)
⦿ 500ml Vegetable Stock
⦿ Himalayan Sea Salt (to taste)

➾ In a large stockpot, melt the coconut oil and add the onions once the oil is hot. Add salt - it will help the onions to release their water and caramelize. Cook onions until they begin to get brown, stirring often to prevent them from burning. This should take about 20 minutes.
➾ Once onions have a nice brown colour, add the chopped garlic. Cook for a few minutes, but do not let the garlic brown.
➾ Add curry and turmeric powder and cook for about a minute, stirring constantly.
➾ Add pumpkin, coconut milk and vegetable stock and bring to a simmer.
➾ If you have a hand blender, you can blend the soup right in the pot and enjoy it right away.
➾ If you're going to use a regular blender - be VERY careful! Blending hot liquids causes pressure to build up in the jar and the lid will be forced off, leaving you will very hot soup all over you (and most likely burned too :( ). Please don't make this mistake. If you are going to blend the hot soup in the blender, please follow these precautions:

  1. Remove the stopper from the middle of the blender's lid.
  2. Fill the blender no more than halfway full - you'll have to work in batches.
  3. Use a thick folded hand towel to cover the hole in the lid.
  4. Start the blender on low to get it going and slowly lift the towel to let some steam escape.
  5. You can then turn up the power to reach your desired consistency.
Enjoy this spicy, creamy soup.


Friday, December 20, 2013

This is a super easy salad that's sure to impress your guests ;)
Baby Kale, Avocado, Pomegranate & Walnut Salad w/ A Lemon Mustard Dressing
Serves 2

For Salad:
  • 1 box Organic Baby Kale (I like these two brands)
  • 1/2 Large Avocado (or 1 whole small one), diced
  • 1/2 Pomegranate
  • 2 Hand-fulls of Walnuts, chopped
For Dressing:
➨ Combine the ingredients for the dressing in a small jar and shake well.
➨ Toss kale with about 2 tbls of dressing and use your hands to massage dressing on the leaves.
➨ Divide dressed kale into 2 bowls and top with pomegranate seeds, cubed avocados and chopped walnuts. 


Enjoy ☺

Tuesday, October 15, 2013

You won't believe this carrot cake is raw!
A couple of weeks ago I threw my third Pop-Up Dinning Event! This time I teamed up with my very good friend Grace van Berkum of Gracious Living and we presented four courses of delicious raw foods for 24 guests. We held this event at another friend's amazing little gelato cafe, Boreal Gelato. The evening was a great success and all the guests left with full bellies and happy faces!

On our menu was:
▶  Curry Coconut Pumpkin Soup w/ Sunflower Sprouts
▶  Apple, Fennel & Walnut Salad w/ Maple Lemon Dressing
▶  Mixed Veggie Noodles w/ Creamy Thai Sauce (get this recipe here)
▶  Chai Spiced, Superfood Carrot Cake w/ Vanilla Frosting 


My favourite dish of the evening was our Chia Spiced Superfood Carrot Cake. One guest even asked if you could eat it for breakfast without feeling guilty... And you know what? - You can! This baby is packed full of nothing but healthful nutrition! We even got to try out a fantastic new vegan protein powder called: Raw Power Superfood Mix and we incorporated it into this delicious cake.

I hope you enjoy it as much as we did...I think this is my new favourite dessert ;)


Filling:
2 C Raw Almonds
1/2 C Raw Walnuts
1/2 C Raw Pecans
12 Fresh Medjool Dates, pitted 
1/2 C Raisins
1/2 C Shredded, Unsweetened Coconut
4 Large Carrots, shredded
1/2 C Pumpkin Protein Mix (optional)
2 tsp Cinnamon
2 tsp Nutmeg
2 tsp Black Pepper
2 Cloves
8 Cardamom Seeds
Fresh Ginger to Taste
2tsp Chia Seeds

Vanilla Frosting:
1/2 Fresh Vanilla Bean or 2 tsp Vanilla Extract
2.5 C Raw Cashews, soaked
3/4 C Water (room temperature)
3/4 C Cacao Butter or Coconut Oil
4 Tbls Maple Syrup
1 tsp Sea Salt

Equipment:
Food Processor
Shredding attachment for food processor or Cheese Grater
Blender, preferably a high speed one, like a Blendtec or Vitamix
9" Springform Pan (but you could use any baking pan too)
 Spice/Coffee Grinder (if using fresh spices)
Olive Oil (for greasing pan)

Directions:
☞ Soak the raw cashews for at least 1 hour and up to 4 hours. Make sure you buy raw, unsalted cashews and not roasted ones. Rinse them after they are finished soaking and set aside.

☞ If using cacao butter for the frosting, place it in an oven-safe pan inside your oven, and set to the lowest temperature your oven goes to. Alternatively, you could put it inside a dehydrator set to 115°F. Cacao butter solidifies at room temperature very quickly, so you want to keep it warm until you are ready to use it. If you can't find cacao butter, coconut oil will also work, but the end result will be a much softer frosting. I highly recommend cacao butter if you can find it. I get mine from The Healthy Planet here in Toronto.

☞ Clean carrots well. If they are organic you won't need to peel them first but if they are conventionally grown, you should peel them. Using your food processor's shredding attachment, shred all the carrots. Or use a cheese grater to shred by hand. Set carrots aside.

☞ I like to use fresh spices whenever possible, so I threw a cinnamon stick, fresh cardamom seeds, cloves and black peppercorns into my spice grinder, but you could also use the powdered versions of all these spices. Then I used a microplane to grate fresh ginger (about a 2" piece) and fresh nutmeg.

☞  Using the S blade on your food processor, add half of the shredded carrots and all of the filling ingredients (except the raisins) to the processor bowl. If you have a small food processor, you may need to do this step in two parts. Make sure your dates are very fresh. These are what hold the cake together. If yours are felling very dry, you may want to soak them in some warm water for an hour or so.

☞ Transfer the filling batter to a large bowl and hand mix in the rest of the shredded carrots and the raisins. By hand mixing these ingredients in, it gives the cake a bit more texture.

☞ To make the frosting, add the water to the blender first, then the soaked cashews, vanilla bean, maple syrup, and salt and blend well. Once it's very well blended, slowly add the melted cacao butter (or coconut oil) though the top of the blender lid while you continue to blend. If you're using coconut butter and the frosting seems too liquidy, just put it in the fridge for a little bit to firm it up. If it's too thick, add some warm water - a tablespoon at a time and blend until it's the right consistency.

☞ Grease the pan with some olive oil and press half of the cake batter into the bottom of the pan. Next, add half of the frosting over the base of the cake. Put cake in the fridge or freezer for a few minutes to set up.

☞  Press the second half of the cake batter into the pan and cover with the remaining frosting. Feel free to decorate the top of the cake with whole walnuts, or dried cranberries, or shredded coconut or anything else you're inspired to top it with?!

☞ Let the cake set up in the fridge for a least 3 hours or 1 hour in the freezer.

☞  Slice and enjoy!


Friday, May 17, 2013


Green Salad, Creamy Cilantro Ranch Dressing, Vegan Sour Cream
Green Salad w/ Back Beans, Avocado and A Creamy Cilantro Ranch Dressing
Serves 2
➨ Combine first 5 ingredients in a large bowl.
➨ Toss to distribute dressing
➨ Serve in 2 bowls and top with Sunflower Sprouts

You could also add corn, black olives, & your favourite protein to this salad. I just didn't have anything else in the house!

Enjoy ☺


Top: Vegan Sour Cream
Bottom: Creamy Cilantro Ranch Dressing
This dressing is DELISH, if I do say so myself! It's wonderful on salad, on tacos, fajitas, or anywhere else you'd like some creamy herbal flavour.  It's dairy-free, but you'd never know it. To make this delicious dressing and sauce, you'll need to first make vegan sour cream - but don't worry, that takes less than 5 minutes!

Vegan Sour Cream
makes 1 cup

  • 1C Raw Cashews (soaked in water for 1-3 hours, then rinsed)
  • 1/4 C Spring Water
  • Fresh Lemon Juice (from 1 large lemon)
  • 1/2 tsp Himalayan Sea Salt
  • Splash of Apple Cider Vinegar
⇰ Blend all ingredients in a blender until very smooth. A tip to getting things to blend well is to put all the liquid in first, and then the solids. You may need to add more water to get it to the right consistancy.

Vegan Sour Cream
Creamy Cilantro Ranch Dressing
makes about 1 cup

  • 1/2 C Vegan Sour Cream
  • Fresh Cilantro (1 large handful)
  • Fresh Lime Juice (from 2 limes)
  • 1/2 tsp (each) Dried Herbs (I used basil, oregano & tarragon. But use whatever dried green herbs you've got)
  • 1 Pinch of Himalayan Sea Salt
  • Freshly Ground Black Pepper
⇰ Blend all ingredients in a blender until very smooth.
⇰ Enjoy the fresh and creamy flavours!


Creamy Cilantro Ranch Dressing {vegan}

Friday, March 15, 2013


Giving up dairy has only been hard when I'm around cheese. I LOVE cheese. Like a lot. Like seriously... a lot more than the average person!
I used to eat cheese at almost every meal, so giving it up has been a little challenging, but I'm determined to keep it up. I have been pleasantly surprised to find satisfying alternatives to dairy that completely appease my cravings. Like this super yummy nut cheese. Does it taste like brie, gouda or gruyère? Absolutely not! But it's darn delicious and it doesn't come with all the potential health issues that eating dairy does. These crackers are awesome too, but they do require a dehydrator to make them.
I should warn you: This recipe is not an instant gratification kind of recipe. The whole thing takes 2 days to make, so it's really a plan ahead type of thing!

Cashew & Macadamia Pesto Cheese:

For the Pesto:
  • 3/4 cup Basil Leaves [tightly-packed
  • 1/4 cup Pine Nuts
  • 3 Tbls EVOO
  • 1/2 tsp Himalayan Sea Salt
  • 1/2 clove Garlic
  • 1/2 teaspoon lemon juice
  • 1 tsp Nutritional Yeast [optional]
► Process all ingredients in a mini food processor (or a regular one), leaving somechunkiness.

 For the Cheese:
  • 1 cup Raw Cashews [soaked for 2-4 hours]
  • 1 cup Raw Macadamia Nuts [soaked for 2-4 hours]
  • 1 cup Water
  • 1 tsp Probiotic [I just emptied a few capsules until I had a teaspoon full. It turned out to be 4 capsules of the brand that I use]  
  • 2 tsp Nutritional Yeast 
  • 1 tsp Onion Powder
  • 1⁄2 tsp Himalayan Sea Salt 
  • 1 teaspoon lemon juice  
  • Smoked Paprika [to sprinkle on top]
► Blend nuts, water and probiotics in a high-speed blender or food processer until very smooth.
► Place the mixture in a strainer that has been lined withcheesecloth and place a weight on top. The weight shouldnot be so heavy that it pushes the cheese through thecloth, but heavy enough to gently start to press the liquidout. Leave to culture at room temperature for 48 hours.
► Once culturing is complete stir or process in the nutritional yeast, onion powder, salt and lemon juice by hand or with a food processor.
► Using an oiled ring mould or a small spring-form pan, build a layer of cheese inside it.On top of that layer place a layer of pesto. Top it off withanother layer of the cheese.
► Even out the top layer and sprinkle with smoked paprika to cover the whole top.
► Place in the refrigerator tofirm up for at least an hour.
► Remove the ring mould and enjoy on some delicious crackers.... like these ones below, perhaps?

Raw Almond Crackers:

  • 1 cup Almond Flour*
  • 1/2 cup Pecans
  • 3 Tbls Olive Oil
  • 1/4 cup Flax Meal 
  • 1 medium Zucchini [peeled and roughly chopped]
  • 1 tablespoon lemon juice
  •  2 tablespoons nutritional yeast
  • 1/2 teaspoon salt
*grind 1 cup of almonds ina food processor into a fine powder to make almond flour. Do not process more once it's become a fine powder, as it will start to turn into almond butter. It's even ok if there are a few chunks, for this recipe.
► Process all ingredients in a food processor until smooth.
► Spread thinly on a non-stick dehydrator sheet. This part is a bit tough as the dough is very thick. I wet my hands and spread everything out with my wet hands. Try to get them as thin and even as possible.
► Use a knife to score into individual crackers.
► Dehydrate for 2 hours and then remove from non-stick sheet, and flip onto other side.
► Return to dehydrator on a mesh tray until crispy... approximately 4 -7 hours, depending on your climate.

Enjoy your labour of love :)

These recipes are adapted from the Russell James "Raw Nut Cheese" eBook.
In the summer of 2012 I made a decision to follow my true passion and try to pursue a career in the food industry. I had just spent an amazing week in St. Lucia watching the ever so inspiring Grace van Berkum motivate and teach people the power of raw foods and yoga. I retuned home with a newly realized goal to become a personal chef and quickly signed up for culinary school at George Brown College. I also began researching raw food courses after seeing how interested people were in Grace’s teachings and I figured it would be a great skill to incorporate into my future business.
I found a raw food course being offered in October at The Raw Foundation in Vancouver, BC. and I signed up. I figured I could tie in my yearly visit with old friends to this class, so it seemed like a win win situation.  At that time I was still eating a pretty standard American diet – or SAD as it’s known, yet I had convinced myself thatI was making mostly healthy choices because I only ate meat 3 or 4 times a week, I avoided gluten and ate a salad for lunch on most days. However, pizza, mac & cheese and cheese & charcuterie platters were also regular stars in my meal rotation.
By the time October rolled around, my attitude about the raw chef certification was that I was taking this class for the sole purpose of gaining skills for future clients. I never thought for one second that I would start to crave raw vegan foods in my life. I certainly was not planning on giving up meat! I was expecting a cooking class much like the classes I was taking at George Brown (but without any actual cooking). What I got was 26 hours of intense nutritional information and training with some food preparation sprinkled in, and it was incredible! It was one of the most motivational and inspiring things I’ve ever done for myself, and it marked the beginning of a new and very exciting phase of my life.
Of all the super informative material I learned that weekend, one thing that stood out the most was when my instructor, Janice Skoreyko said that eating a big breakfast actually slows down the metabolism by up to 40%. WHAT? - I thought. How can that be? We’ve all been told that ‘breakfast is the most important meal of the day’! And that ‘you need a big breakfast to fuel your day’. Well as it turns out, this is just one of many misconceptions our society has about how proper nutrition really works. Janice explained that it’s called ‘breakfast’ for a reason: You’re breaking a fast. She purposed ‘if you were actually fasting for a few days, would you break it with a plate of eggs, bacon, home-fries and toast?’ Well no, I thought – that would make me feel gross and sick after not eating for a few days and I’d probably need a 2 hour nap not long after eating all that! Well that’sexactly the same thing you are doing to your system when you eat a big meal first thing in your day. Your body now needs to devote a lot of energy into digesting those eggs or oatmeal or breakfast sandwich, leaving less energy for you to concur your morning.
Instead, she offered, why not inject a burst of vitamins, minerals and enzymes directly into your bloodstream, bypassing the need for much digestion, with raw vegetable and fruit juices?
Janice put forth a challenge: For the next 30 days, begin each day with her Green Energy Elixir instead of eating your typical breakfast. She blended up a mix of organic spinach,bananas, dates, spirilina and water in her vitamix and poured us a glass. She explained that bananas have to have brown spots on them to signify their ripeness. Prior to this transformation, they remain a starch and are very hard to digest. Once they have truly ripened they become a simple sugar, ready for our bodies to turn them into pure energy. She also warned us about using too much spirilina too soon. It is a very potent detoxifier and should be added in small amounts until your body gets used to it, working up to 2 tablespoons overtime.  
The very next day I marched over to Whole Foods and gathered up all the ingredients for my new morning routine. I was extremely skeptical and was expecting to be hungry soon after gagging down this bright green concoction. To my surprise, the green concoction actually tasted pretty good and Janice’s recipe made about 2 liters of the stuff! It took me the better part of 2 hours to finish it all and I wasn’thungry for another 2 hours after that.
I continued on with this every morning for about 2 weeks. I immediately noticed a huge difference in my energy levels. I’m normally the type of person who takes about 2 hours every morning to feel 'normal'.  I don’t normally engage in conversation early in the mornings and I don’t really feel ‘myself’ until long after I’ve been awake. Suddenly I felt great every morning! I completely lost the need for coffee and I felt like the best version of myself within 20 minues of being awake.
After about 2 weeks I switched from the blended Energy Elixir to using my juicer to make green vegetable juice. I use a ratio of 70% organic green vegetable mixed with greenapple, lemon and ginger. Because the juicer extracts all the fiber from the fruits and vegetables, the vitamins, mineral and enzymes enter your bloodstream even faster and digestion is completely avoided.  This only heightened my energy levels and clarity. I also started to notice that I was sleeping much better, not tossing and turning like I normally did. And oddly enough, my general outlook on life seemed to be far more positive. After 6 weeks I had lost 7 lbs, by not changing anything other than my breakfast habits … all this from green juice!
It’s been about five and a half months since I started juicing regularly and more recently I decided to give up dairy and meat too. I am constantly reading up on nutrition and finding inspiration for vegan meals that taste amazing. I feel incredible and I’m excited to see where life takes me next. My passion is now in the power of whole foods. I want to show people that healthy eating doesn’t have to mean sacrificing flavour. I’m trying to create meals that satisfy the foodie in me, while nourishing my body and mind and energizing me along the way. Will I besomeone’s personal chef? Will I open a plant-based food service? Only time will tell, but I know one thing is definite: my life has been forever changed and I owe it all to green juice.

Mandy’s Morning Mojo:

Adapted from Janice Skoreyko’s Energy Elixir
{equipment needed = high powered blender or regular blender}

1 Bunch Spinach*
400 ml Filtered Water
2-4 Bananas* (very ripe)
3-5 Medjool Dates* (soaked & pitted)
1 tsp to 2 Tbls Spirilina or Chlorella Powder
Juice from 1/2 Lemon*
1” Piece of Ginger* (peeled)


* = Organic Ingredients

If using a regular blender: Add spinach, water and dates and blend very well. Then add the rest of the indigents and blend well again.
If using a high powered blender: add everything at once and blend until smooth.
Enjoy the energy :) 


Mandy’s Morning Green-Zinger:

{equipment needed = juicer}

1/2 Bunch [approx. 6 leaves] of Lacinato Kale* (Dino Kale)
1/2 Bunch [approx. 6 leaves] of Curly Kale*
1 Bunch Parsley*
1/2 to 2/3 Fennel Bulb [stalks and greens included]
2 Stalks Celery*
1 Lemon* (whole)
1 Green Apple*
1” Piece of Ginger*

Start with the kale and parsley. Don’t worry if some of it gets stuck in the bottom part of the juicer - once you start juicing the harder ingredients, they will push the rest through.
Do not peel the lemon. If it is organic you can put the whole thing in the juicer and you will benefit from all the extra vitamin C in the peel. Did you know that one lemon with the peel provides 139% of the recommended daily value of vitamin C?!  
So drink up and be well :)

* = Organic Ingredients


[This article was originally posted on Gracious Living]


Saturday, December 29, 2012


I am giving up dairy in 2013 and in preparation for that, I have been trying to come up with substitutes for many of my favourite dishes. This one blew my socks off (not to toot my own horn or anything)! I actually like it better than most dairy based cream sauces I've tried! 
Giving up dairy is going to be quite a challenge for me, as I've been addicted to cheese for as long as I can remember, but I know that dairy is negatively effecting my health and it's time I let go of my cheese addiction! If you'd like some more information on some of the negative effects dairy can have, check out some of these links.


Sautéed Kale & Fusilli in a Tahini Garlic Cream Sauce
serves 2

➽ Finely dice shallots and garlic.
➽ Chop kale into 2-3 inch pieces. I removed the stalks from the bottom portion of the kale as they were pretty thick.
➽ In a large pan, melt coconut oil under medium heat. Add shallots and cook until they are translucent. 
➽ Add kale to pan and wilt.
➽ Add garlic and cook for about 30 seconds (do not let garlic brown).
➽ Add tahini, coconut cream, red chili flakes (if you like it hot), salt & pepper. Stir until the tahini is melted (about 20 seconds).
➽ Add cooked pasta and some of the cooking water to achieve your desired consistency of cream sauce.
➽ Divide into two bowls and enjoy :)


Often when I make my Raw Lasagna I have a bunch of leftover filling. So I thought I'd share some of the ways in which I use it up. 


Lasagna Bites
These are great for parties.
I used a mandoline slicer to cut the zucchini into strips that are about 3-4mm thick.
Then I cut them into bite sized pieces - about 4cm wide.
Now assemble them on a platter:
⇰ Zucchini on bottom
⇰ Layer of Lemon Pepper Vegan Ricotta
⇰ Zucchini
⇰ Layer of Tomato Ragu
⇰ Zucchini
⇰ Pesto on Top
One thing to note: zucchini likes to let go of it's water content once it's cut so your platter may become watery if these are not served and consumed right away. But no worries if this happens... just use a paper towel to soak up the excess water and clean up the plate :)


Half & Half Raw Spaghetti

This is one of my favourite things to bring for lunch. It takes about 5 minutes to prepare and is SO delicious. You'll need a Spiralizer or a Julienne Peeler to make the noodles out of zucchini or yellow zucchini. Depending on the size, I use one or two zucchinis for my lunch.
⇰ Toss half the noodles in the tomato ragu and the other half in the pesto.
Yum!


Stuffed Peppers

This is another favourite lunch of mine. And again, it's SO fast and easy to make.
⇰ Just cut a pepper in half and remove the pulpy white inner cavity.
⇰ Now fill with Lemon Pepper Vegan Ricotta, Tomato Ragu and Pesto. 
These can be prepared the night before and hold up well in the refrigerator too. 

Tuesday, December 11, 2012


raw vegan lasagna
This one is a bit of a labour of love, but it's totally worth the effort... IT'S SO DELICIOUS!
Also, there are a lot of variations for how to use these ingredients in different ways. I'll post these variations in another blog post.
 All three sauces can be made a day in advanced and kept in the fridge.

Lemon Pepper Vegan Ricotta
  • 2 C Pine Nuts or Cashews (soaked for at least 8 hours and rinsed)
  • 2 Tbls Fresh Lemon Juice
  • Zest of 1 Organic Lemon
  • 1 Tbls Fresh Ground Black Pepper
  • Himalayan Sea Salt (to taste)
☞ Mix all ingredients in a food processor until well combined and the approximate consistency of ricotta cheese. If the mixture is too think, add a few tablespoons of water, one tablespoon at a time until you get the right consistency.  

Pistachio Pesto
  • 2 C packed Basil Leaves
  • 1/2 Pistachios (could use Pine Nuts or Cashews too)
  • 6 Tbls Olive Oil
  • 1 tsp Himalayan Sea Salt
  • Freshly Ground Black Pepper (to taste)
☞ Pulse the nuts in a food processor until they are the size of rice. Add the rest of the ingredients and process until well combined and slightly chunky.

Tomato Ragu
  • 2 C Sundried Tomatoes, soaked until soft
  • 1/2 C Roma Tomatoes, roughly chopped
  • 2 Tbls Red Onion, chopped
  • 1/4 C Olive Oil
  • 2 Tbls Lemon Juice
  • 1 Tbls Agave Nectar
  • 1 tsp Onion Powder 
  • 1/4 tsp to 2 tsp Red Chili Flakes
  • Himalayan Sea Salt (to taste)
☞ Process everything in a food processor until well combined but chunky.


Zucchini Noodles
  • 4 Large Zucchini,
  • 2 Tbls Olive Oil
  • 2 Tbls Fresh Oregano Leaves
  • 2 Tbls Fresh Thyme Leaves
  • 1/4 C Fresh Basil Leaves, chopped
  • Himalayan Sea Salt & Black Pepper (to taste)
☞ Use a vegetable peeler to create flat 'noodles' out of the zucchini, stopping at the seedy part. Cut noodles into 2 - 3 inch pieces and toss in bowl with herbs, oil, salt and pepper.

To Assemble 
☞ Place 2 or 3 noodles on a plate. Top with tomato ragu, lemon ricotta, and pesto. Repeat twice more for a single serving of raw lasagna.

ENJOY :)

Recipe from The Raw Foundation


This one was inspired by an amazing salad I had at The Drake the other night. Before this I wasn't the biggest fan of raw kale...But after trying this delicious, tart & mustardy salad I am a full convert. I let mine marinate for at least an hour and up to overnight. It wilts the kale enough to make it more palatable. 
Enjoy!

  • 1 Bunch Organic Curly Leaf Kale
  • Juice from 1/4 to 1/2 a Lemon
  • 1 Tbls White Wine Vinegar
  • 1 Tbls (heaping) Grainy Mustard
  • 2 Tbls of Your Best EVOO (more if you like it a little less tart)
  • 1 pinch Himalayan Sea Salt


☞ Whisk the lemon, vinegar, mustard and salt together in a large bowl.
☞ Slowly add the oil while whisking to emulsify a bit.
☞ Wash kale and tear leaves into edible pieces, discarding the stems.
☞ Toss kale in dressing and set aside in the fridge for an hour and up to overnight.


Thursday, May 10, 2012

This one starts with my Easy Vegan Pesto!

  • 1 Cup Fresh Basil Leaves (basically 2 packs of those bunches you get at the supermarket)
  • 1/4 Cup Pine Nuts
  • 1 or 2 Garlic Cloves
  • 1/3 Cup Olive Oil
  • Salt & Pepper
▶ In a dry frying pan, gently toast pine nuts until they start to brown. Stir them fairly often so they don't burn.
▶Add all the ingredients to a high powered blender or Magic Bullet. I press my garlic through a garlic press first, to ensure I don't get any chunks of raw garlic in my finished sauce.
▶ Pulse and blend until you have a smooth sauce. You may need to add a bit more oil to get the right consistency.
❉ ✼ ❉ Easy Vegan Pesto is also amazing on a very non-vegan steak! 
Or on pasta, chicken and asparagus too! ❉ ✼ ❉
To make this delicious and nutritious salad, you will first need to get yourself this nifty tool! It's a julienne peeler or if you want to be really fancy, get yourself a spiral slicer or julienne slicer. Any of these will work!
Then you'll need:

  • 5 Medium Zucchinis
  • 1 Pint Organic Cheery Tomatoes
  • 1 Avocado
  • 1 Handfull Sunflower Sprouts
  • 2 Tbls Easy Vegan Pesto
  • Salt & Pepper
▷ Use your julienne peeler, spiral slicer or mandoline to cut all your zucchinis into noodle like strips.
▷Slice tomatoes in half, length wise.
▷ Cut avocado into cubes.
▷Season with little bit of sea salt and as much pepper as you like.
▷Toss well with 2 tablespoons of my Easy Vegan Pesto
▷Add individual servings to bowls and top with a few sunflower sprouts.
▷Enjoy!

This keeps in the fridge for a day or two. 
✻ ❉ ✼  I used my leftovers in an omelet and it made for a delicious breakfast! ✻ ❉ ✼

Saturday, May 5, 2012


These are a fast and delicious lunch option


  • 1 Can Crab Meat
  • 1/2 an Avocado
  • 1 Small Yellow Mango
  • Sunflower Sprouts
  • Boston Lettuce (also called Butterhead or Bibb Lettuce)
  • 1/2 a Lime
  • Chipotle Mayo (recipe below
It all starts with delicious Chipotle Mayo! There are two ways to make it:
The Easy Way:
Add 1 to 4 chipotle peppers and a little bit of the adobo sauce (it's what the peppers are in) to approximately 1/4 cup to 1/2 cup of your favourite mayo, and blend well in a blender. I used 4 peppers because I like it very spicy, but use less if you're not a spice freak like me!
The Healthy Way:
Follow THIS recipe for delicious home made mayo and then add 1-4 chipotle peppers, and a little bit of the adobo sauce to it and blend.

- Now add about 1 teaspoon of your spicy mayo to 1 can of drained crab meat and mix well. Use more if you find the mixture too dry.
- Cut your avocado and mango into cubes.
- Squeeze some lime all over your avocados and squeeze any remaining lime into the crab mixture.
- Place 2 pieces of lettuce down, back to front to form a 'cup'.
- Add a heaping spoonful of your crab mixture to the cups.
- Top each cup with diced mango and avocado and a few sunflower sprouts.


Et Voila! You've got yourself a healthy and tasty lunch!!
Hope you like :)


Thursday, April 12, 2012

Steamed Mussels in a Goat Cheese, Jalapeño, Tomato Sauce
  • 2 to 3lbs of Mussels
  • 2 Large Shallots (or 3 small ones)
  • 1 to 3 Fresh Jalapeños (depending on your heat preference)
  • 2 Garlic Cloves
  • 1/4 Cup White Wine
  • 1/4 Cup Stock (fish would be best, but you could use vegetable or chicken too)
  • 1/4 Cup Tomato Sauce (use a high quality jarred sauce or your own recipe if you're up for it!)
  • 3 oz Goat Cheese or 3 tbls Heavy Cream (35% or Whipping Cream)
  • 1 tbls Olive Oil
 ➾ Start by cleaning the mussels and removing their beards. Discard any that have broken shells, and they are most likely dead and un-eatable.

➾ Next, finely chop the shallots and garlic.
Remove the seeds from the jalapeños if you want it a little less spicy, and dice the peppers.

➾ Add the olive oil to a large stock pot and turn stove to medium heat.
➾ Add Shallots and cook for about 5 minutes.
➾ Now add the jalapeño peppers into the pot and cook for another 5 minutes.
➾ Add the garlic and cook for about 2 minutes, but do not let the garlic get brown (stir often).
➾ Now add the wine and cook for another 2 minutes, scraping any brown bits off the bottom of the pot.
➾ Add the stock, tomato sauce and goat cheese and stir until the goat cheese has melted and the sauce starts to bubble.

➾ Next, add the cleaned mussels to the pot. Give them a good stir to coat them in the sauce and then cover with a lid. Keep covered for about 4 minutes. Remove cover and give them another good stir and cook for another minute or so.

➾ Serve & Eat!
Make sure not to eat any mussels whose shells are not open.
If They Don't Open, Don't Eat'm!
It means they were dead when you bought them and therefore, bad.

**3 lbs is enough for 2 large, entrée servings.** We ate ours with garlic bread for sopping up this delish sauce.
Enjoy

The finished product 

Wednesday, April 4, 2012


Grilled Shrimp & Quinoa Salad, Mango Cashew Salad, Cilantro Lime Dressing


Cilantro Lime Dressing:

  • 3 Limes
  • 1/2 Bunch of Cilantro Leaves
  • 1 Tbsp Tarragon Dijon Mustard (or regular Dijon)
  • 1/2 Cup Extra Virgin Olive Oil (good quality)
  • Pinch of Sea Salt
  • Pinch of Pepper
Chop the cilantro, removing as much of the stems as possible. Add the juice from the lime and all the ingredients into a Magic Bullet or blender. Blend until all ingredients are combined and the dressing is slightly emulsified.
If you don't have a Magic Bullet or Blender to use, then combined all ingredients in a bowl except the oil. Using a metal whisk, whisk vigorously. Keep whisking while you slowly add the oil, a little bit at a time, until all the oil has been combined. This should create the same results....only with a lot more muscle work!

Grilled Shrimp & Quinoa Salad


Grilled Shrimp & Quinoa Salad:

  • 2 Cups Quinoa (could use 1 cup regular and 1 cup red quinoa)
  • 1 Bag Frozen Shrimp (fresh would be even better!)
  • 2 Cans of Corn (if it's corn season, use fresh corn)
  • 1 Pint Organic Cherry Tomatoes
  • 3 Avocados (firm but ripe)
  • Juice of 1 lime
  • 2 Jalapeños (seeded and finely chopped) 
  • 1 Bunch Cilantro (use flat leaf parsley & my citrus dressing  if you hate cilantro)
  • Dash of Sea Salt and Pepper (to taste)
Cook the quinoa as per package directions. I use a rice cooker for mine and it always comes out perfectly. Let quinoa cool before mixing with the rest of the ingredients.

Defrost and rinse shrimp under cold water. Drain, pat dry & skewer. Grill Shrimp on BBQ for about 3 minutes on each side - Do NOT over cook them!


Now here's the annoying part...once shrimp is cool enough to touch, peel off all the shells. This takes a while but it really makes a difference to your guests - No one likes taking shells off their shrimps once they are in a meal!

Next, slice the tomatoes in halves, lengthwise and add to bowl of cooled quinoa and peeled shrimp.

Add drained or fresh corn kernels.

Cube avocados and soak them in the lime juice for 1 minute. This will prevent them from browning. Add to bowl, discarding leftover lime juice.

Roughly chop the cilantro, using just the leaves (it's ok if there are a few stems in there too :)


Now add approximately 1/4 cup of the Cilantro Lime Dressing, a little dash of sea salt and as much cracked black pepper as you like. Give it a really good toss and voila! You've got yourself a delicious, nutritious salad that will keep for about 4 days in the fridge.
Serves about 12+ side dish sized portions.


Mango Cashew Salad with Spinach & Sunflower Sprouts:

Cube Mangoes.
Roughly chop the cashews. 
Add all ingredients together in a bowl (use as many or as little sprouts as you like). 
Add approximately 2 tablespoons of the Cilantro Lime Dressing and toss well.

Enjoy!!!
Serves about 4-6 side dishes or 2-3 main dishes. You could add chicken or shrimp to this to make a yummy dinner too.
This little jar may not look like much, but it's full of my super spicy, delcios dip!
  • 2 Avocados
  • 1 to 4 Chipotle Peppers (depending on how HOT you like it?!)
  • Lime Juice (from 1 medium lime)
  • 1/8 Cup Olive Oil (use the extra virgin, good stuff!)
  • Pinch of Sea Salt
  • Pepper to Taste
Blend all ingredients in a blender until combined. I used 4 chipotle peppers in mine because I love things really spicy, but I suggest starting with one and working your way up from there!

Enjoy on salads or as a dip.
Lately I've been using this as a dip for Live's Raw Crackers for a fully vegan, healthy midday snack!

Enjoy!

Monday, March 26, 2012

A Super-Easy and Fast Salad


⬅ For the Citrus dressing you will need these ingredients:

✔ 1/2 a Lemon
✔ Dijon Mustard
✔ White Wine Vinegar
✔ Extra Virgin Olive Oil
✔ Sea Salt
✔ Pepper


In a large bowl, whisk together approximately:
➤ 1 tablespoon of dijon mustard
➤ Juice of half a lemon
➤ 2 tablespoons of vinegar
➤ 1/8 cup of EVOO
➤ a pinch of salt
➤ as much pepper as you like

For the Salad:
➤ Cut 2 large heads of broccoli into bite size pieces, discarding the stems.
Blanche the broccoli for 1 minute and quickly rinse in cold water or add to ice bath. You DO NOT want to over cook them as it will lead to a soggy salad :(
➤ Drain and dry broccoli and add to bowl with dressing
➤Add sliced olives and sliced roasted red pepers. I used canned olives and a jar of red peppers, but you could use fresh stuff if you have more time on your hands.
➤ Lastly, crumble about 150g of semi-soft cheese into bowl and toss in the dressing. I used Brebis cheese, but you could also use goat cheese or feta.
This lasts for a good day or 2 in the fridge and serves about 4 portions. The key is to not over-cook the broccoli or to over-dress the salad. Leftovers are perfect for lunch the next day!